Friday, 23 November 2012

Fashion Fridays - Interview with 'Kiss and Make Up Beauty'


Today's interview comes from the fabulously talented Tammy Treacher.  Tammy runs a home-based beauty salon offering a fantastic range of treatments and products.  Tammy has been a beauty therapist for 9 years, she trained at the London School of Beauty and Make Up.


Congratulations on the launch of your new website 'Kiss and Make Up Beauty'

How does it feel to have had your nail art published in the ‘Look’ magazine?
It feels fantastic! To have your work picked out from so many others and then to have it published in a national magazine, twice, is pretty special. It most definitely helps with my confidence as a nail technician/artist that my work is appreciated by others.


What made you get into beauty and make up in the first place?
 I had always known I would, as far back as I can remember I would raid my mums make up bag and nail varnishes and practice in front of the mirror. Despite people telling me it was a waste of time and I should be doing something more academic, I did it anyway because I knew it was just who I was.

How do you juggle motherhood and being a working mum?
It can be really hard at times because I am a working mum but I also care for my mum too. So juggling it all can be a test but when I have a good day I look back and feel pretty proud that I coped with everything. Everything I do is for my daughter, Hadley, so I can give her the best I can. So when she gets upset because I have to work, I know in the long run she will appreciate it.

Do you think your daughter might follow in your footsteps?
Well she most definitely loves her nails being done and even attempts to help me at times, it is so cute. She is most definitely a girly girl with an edge of tomboy but whatever she chooses to do in life, I will support her.

Who inspires you in your work? 
Anything or anyone can be an inspiration. My friends and their personal styles, the latest trends, day to day patterns and effects. Thank goodness for camera phones because being able to get a snap shot of the things that inspire me is a massive help.

If you had to wear one nail colour everyday, which would it be?
I would most definitely go with a flat dark colour. A classic dark almost black red. Like Shellac in Fedora.

Nail art is so popular at the moment, what’s your favourite style?
At the moment the more gothic style of nail art is my favourite. Darks, glitter, crosses etc. It compliments the current high street trends.


If you could recommend one beauty treatment for life what would it be?
As much as I LOVE nails and everything about dressing them up, I would have to say an eyebrow wax. Having your eyebrows tidied and shaped and tinted is integral to framing your face and making the best out of your eyes.


What are your top 5 beauty tips?
  1. Always keep your nails tidy. Shape them regularly, buff once a week and push back those cuticles to prevent infections.
  2. Use a good cuticle oil and hand cream. Especially in winter.
  3. Don’t be afraid to have your eyebrows tinted. Tinting doesn’t necessarily mean darker, just a more defined look.
  4. Have regular Pedicures. Feet so often get forgotten about. They need love and attention too.
  5. Always take your make up off before you go to bed. It really does make a difference.


Who is your style icon?
Rihanna. She is fearless and always looks amazing.


A personal thanks to Tammy for taking the time out to talk to us.

If you like what you see then visit 'Kiss and Make Up Beauty'.  Gift Vouchers are now available in time for Christmas.

Nice to see you again.
Xxx

Thursday, 22 November 2012

Crochet Creations

I could not wait to share with you how busy I have been creating crochet.  I am really quite pleased with myself, this is all within two weeks of learning.  I am still very much a beginner, but I very excited about the results already.  


I had to get some new funky crochet needles!

An urgent run to Angmering Framing and Stitches to purchase some practise wool for my granny square blanket.


 Isn't it great to see them all together, I can almost see myself snuggled underneath it already.


Check out this colour selection of Rico Designs Cotton I used for my Deryn Relph flower crochet workshop at Clothkits

I love the colours from Rowan by Amy Butler, I brought mine from A Bit Woolly who were very helpful.


 Cute and Easy Crochet by Nicki Trench has some beautiful crochet projects for all levels.  It seems so far the easiest crochet instructions to follow.

Nice to see you again.
Xxx

Monday, 19 November 2012

All Things PP Announcement - It's a Blue Day!


Much to our delight All things PP has turned out a Little Blue!  

I am so pleased to let you know that our family is growing, the 3 little pigs will become 4.  We are expecting a little boy, joining us sometime at the end of March 2013. 

It's a Blue Day!

Nice to see you again.
Xxx 

Wednesday, 14 November 2012

Interview with SoMO


I wanted to start sharing with you some of my favourite bloggers and handmade friends, so I am going to begin by featuring interviews on my blog.
The first one comes courtesy of fellow S&B, crafty friend of mine, Sarah-Louise.  She has a wonderful blog called SoMO.  Her writing is thought provoking, her photo's are beautiful and her crochet is amazing.  She is certainly very creative.


page1image1192

When and why did you start your blog?
I started SoMO (space of mine own) in January 2012. I initially just wanted an outlet to share and remember my experiences and thoughts, and the things that I enjoy doing, and also crafting that I was doing with my daughter. I maybe had a vague idea that someday in the future I may want to turn something crafty into a business and it may tie in with the blog at some point, but this side of it has never really been a priority for me.

What would you like to achieve with the blog?
I read quite a few blogs that have, at various times, touched my heart, provided inspiration, or helped me feel like I’m not alone when times are rough. At this point, if I can do any one of those things for someone that visits my blog, I’d be happy. In the meantime, it’s a bit of an evolving beast of a journey! I’ve particularly noticed that my content has changed as my little girl is getting bigger and is getting busy with pre- school, playdates and activities away from home. It’s been a natural, gradual change, which is just how I like it.

What do you love most about having your blog?
I don’t think there’s just one thing I love most. I started writing at a similar time that my daughter was reaching an age where I was just getting back a little ‘me’ time, and the blog doesn’t stand alone. I also started my facebook page Space of Mine Own and discovered Pinterest (oh, how I love it!!) My Boards. All these things combined, helped me follow a journey of discovery & rediscovery in terms of crafting and the things I enjoy. I discovered crochet in the Autumn of 2011, and whilst I’ve tried lots of different things in the past (and will continue to do so), this is the one that I’m really loving and has stuck. I’ve also rediscovered how much I enjoy photography and am taking part in a few challenges that help focus my practice, but I guess if I had to pick one, the best thing is that I’ve discovered I actually really love writing...when I can find the time!

How would you describe your style?
My writing style is kind of how I talk in my head ~ a little on the dry side, but with warmth and honesty. My creative style is still (and hopefully always will be) a work in progress, but I love playing with colours and have quite a strong colouristic style. I like how crochet is being modernised and hope to develop my own ranges and designs as I get further along.


You are clearly very creative but if you had to pick one handmade activity which would it be?

Definitely crochet. As I mentioned, I’ve tried many different crafts from cardmaking, sewing, embroidery and tapestry, to painting furniture and making jewellery, but crochet is the only one that has kept my interest and I really want to keep learning and developing.


This weekend you have your first table at a local craft fair, how do you feel?
Petrified! I’m very nervous, but also excited. From small beginnings and all that...

What will you be selling?
Christmas decorations & gifts (or not if you’re like me & just have to have one for yourself too!) There will be pincushions, hair accessories, covered jars (one of my favourites), brooches, coasters and cute flower pencil toppers.


page1image31576
What have been the challenges in preparing for the craft fair?
Time. Being mummy and working part-time has meant that I tend to create in the evenings and it’s invariably been the wee hours before I’ve got to bed. Plus, starting from scratch with no prior ‘stock’ as it were, and deciding on products, pricing and quantity has been tough. Needless to say, the housekeeping has had a solid place at the bottom of the list!


Do you have any recommendations for fellow crafters thinking about selling to the public?

Show your work to anyone who will look and listen, and ask for feedback. My friends and family have been an enormous help with advice and encouragement, and also, posting work as I go along on my facebook page has been great as I can get more impartial feedback just by whether people hit that ‘like’ button.  In terms of selling, I’ll know more after the weekend myself, and I’m hoping to set up an on-line store in the New Year, so I think it’s me that needs advice for now!


Where do you get all your inspirational ideas from?
I love Mollie Makes magazine ~ it’s great for ideas in itself, but also, for finding other people whose work is amazing. I also love Pinterest. I’m just at the point where I can take a pattern but fiddle about with it a little so it suits what I want to do with it, but not quite able to design my own. I think it’s very important to provide credit to any originators though, and I will always do this where I have started from someone else’s pattern.

Which blog is a favourite stalk of yours at the moment?
I’ve become a bit of a blog addict & my Bloglovin’ list grows almost daily, but I always love posts from Rosy Little Things, Bleubird Vintage, Coco Rose Textiles

What is on your creative wishlist?
More time and more yarn!

What is next for you and your fabulous blog?
Well, there’s lots to update once the craft fayre is done. I’ve got loads from the Summer to catch up on and various photo challenges to post up, as well as the progress up to the fayre itself. I’ll be linking to any specific patterns I used or started from, plus how it all went.  I’ve had some product interest via facebook so I’ll be looking into that side of things, and then I’ll be working on developing my own style further into the New Year. 


A personal thanks to Sarah-Lou for taking the time out to talk to us.

If you like what you see then pop along to the Christmas Craft Fair at Broadwater Manor on Saturday 17th November, 12-4pm.

Nice to see you again.
Xxx

Monday, 8 October 2012

Music Mondays - Mumford & Sons


I absolutely love Mumford & Sons, so was so pleased when I heard they were releasing their second album at the end of the September.  On the release date I couldn't wait and downloaded it straight away.  I haven't had much chance to listen to it until this weekend.


I am already hooked.  I like the fact that they haven't changed a bit, why fix what wasn't broken!  'I will wait' is already my favourite song.


S&B Roman Blind Tutorial

Last weekend was amazing for 3 reasons, firstly Mr P took part in and completed the Berlin marathon in 3:22 (so proud I had to share, my brother also ran in 3:44, amazing), secondly I got to spend the weekend with the most gorgeous 7 week old Master F and thirdly I hosted a Roman Blind Workshop for a special Sunday S&B.

I thought I would share the process with you and offer you a 'Roman Blind Tutorial'.    

You will need:
  • Fabric (This should include enough material for the window measurements, adding 4' (10cms) to the width and 5" (12.5cms) to the length to allow for turnings).  Also add allowance for the pockets for the rods, you will need to allow another 2 to 2.5 for each pocket for each.  
  • You can alternatively use tape especially for making roman blinds which you sew onto the fabric, although this can work out more expensive)
  • Plastic rings
  • Metal screw-in rings
  • Self adhesive velcro 
  • Wooden batten of 2.5cm x 5cm 
  • 1/4" (0.6cm) wooden or plastic dowel rods (how many will depend on your window size) wooden are cheaper and available from B&Q
  • 1 x 1" (2.5cm) D-mould rod for the base weight
  • Cord, how much will depend on your blind size, but a guide is one and a half times the length of blind plus width, and should be between 20 and 40 cm across the blind.
  • Coordinating cotton thread

Step 1
Measure your window very accurately.  A metal tape measure works best.  

You have the choice of fitting your blind in the recess of the window or outside.  It will depend if there is enough room in the recess to secure the batten that your blind will be secured too.  Also bare in mind that if you are fitting it inside there is even more pressure to get your measurements exact.

Step 2
After carefully working out your measurements for the blind for your window and worked out where the rods are going, which should be equally spaced going across, by making a drawing.  The bottom rod should be placed at least half the measurement of the rods spaced above.


Step 3
Cut the fabric plus hems for length and width.


Step 4
Iron hems at side,  finished width should be the width of the blind required.  Then machine side hems.


Step 5
Turn bottom hem to make pocket for bottom D-mould rod, turning 1.5 cm and then 3.5 cm then machine making a pocket for the rod.


Step 6
Cut strips of fabric for the rod pockets 5 cm wide and the length should be enough for the width of blind

Step 7
Iron 2cm allowance each end, then iron in half length wise

Step 8
Stitch pocket across back of blind where marked on your drawing, centre-fold should be towards bottom

Step 9
Check length of blind, then turn top over, iron and stitch Velcro along the top


Step 10
Sew plastic rings equally across, for small blind you will only require 3 across

Step 11
Fix the batten to window with the metal rings for all the cords will come through, these rings should be in same position as on the fabric blind

Step 12:
Place the sticky back Velcro on top of batten (you can secure with staples)

Step 13:
Cut your dowling rods just short of the width of the finished blind, then insert into the pockets.  Sew ends secure.

Step 14:
Tie cord to bottom ring thread each length of cord through rings on blind and on batten,  all cord should meet through the final ring.

Step 15:
Fix blind to the top of batten 


With the blind fully down, make sure all the cords are even and tight, make a knot, then plait the strands for approximately 10cm.  Then thread onto a pull.

Step 16
Attach a cleat to the wall, to wrap the cord round


Congratulations - Your Roman Blind Tutorial is Complete - Well Done


With special thanks to Granny G for all her help preparing, planning and leading the Roman Blind workshop. Sarah-Lou for taking the pictures.  And another special thanks to Mrs W for the fantastic fabric, I hope you like it.  

Nice to see you again
Xxx.


Monday, 17 September 2012

Garden - The Vegetable Patch

I can not tell you how happy I am with our vegetable patch.  Now we have never grown a thing from seed and to think that we have had such a variety and consistent supply of vegetables throughout the summer, from only a few packets from the garden centre.  Well we will most definitely do this again next year.

I would like to recommend a vegetable patch to all my friends and family.  It takes up as little or large space as you have the time to manage.  You do not have to have a large garden as many of the crops can be grown in plant pots and containers (we grew potatoes in bags).

I have loved the way Little Miss P has been involved right from the beginning, helping daddy build the raised bed frames, preparing the soil, sowing the seeds, watering the seedlings, watching them grow, harvesting and of course the best bit, the eating!


I did a lot of research beforehand, as I was very realistic about the time we would have available to commit to the vegetable patch.  We chose vegetables we loved to eat, as we thought this would motivate us to nurture, but we also picked seeds which could be sowed straight into the ground.  We do not have a greenhouse, although at some point I will no doubt mature to the point this will be on a birthday wish list (I asked for a potting bench this year!)


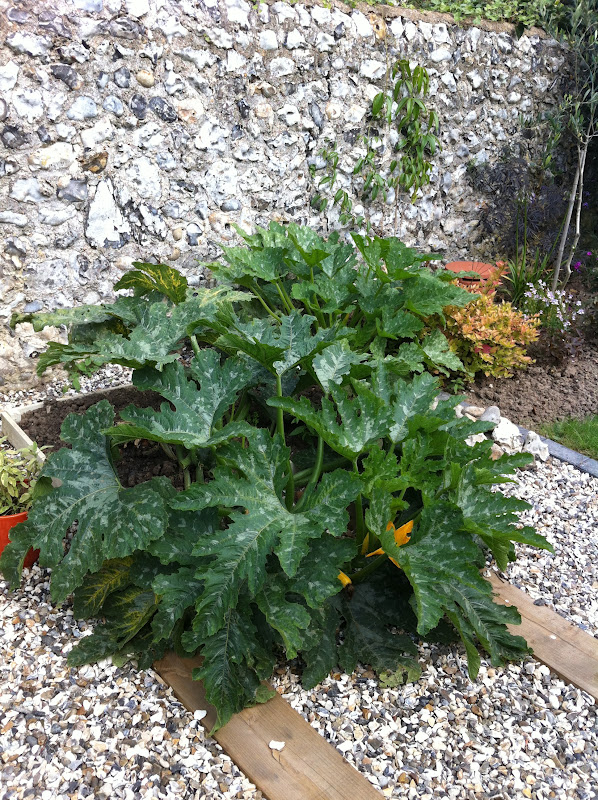
We have had an 80% success rate in our first year, isn't that amazing (we think so!)  One failure (carrots) and one disappointing crop (didn't get as many potatoes as we hoped for).  Apart from that we have had a constant supply of multi-coloured radishes, yellow zucchinis, beetroot, spinach, lettuce and spring onions.


Now as we harvest the last of the crop, we can begin to prepare and plan for next year.

Nice to see you again.
Xxx